You have to make a move one of these days. The state of your pool plaster has progressively gotten worse each season with cracks, stains, and delamination, and it’s starting to look lifeless and dull. Perhaps you’re already checking out the cost of resurfacing your plaster pool. But you’re also wondering: Can you paint a gunite pool?
You can paint a gunite pool, and it will help prevent surface stains and damage. The process is DIY-able, but requires draining then cleaning of the pool, typically with a paint-prep solution like tri-sodium-phosphate. Acrylic or Epoxy paint will ten take about a week to cure after application.
Back in the day, painting pools was a very popular option, and it’s still a great way to go today. Gunite pools can last a very long time, and they can be remodeled with new colors or styles to suit different occasions. To find out more, let’s take a look at how to paint a gunite pool and the types of paints you can use.
Can You Paint a Gunite Pool?
Yes, you can paint a gunite pool. You can apply paint directly to gunite, fiberglass, and plaster pools. Epoxy is recommended for an unpainted gunite or fiberglass pool. Pool paints make for a bright, ceramic-like finish that can last a very long time.
Types of Paint for a Gunite Pool
Gunite swimming pools can use acrylic or epoxy-based paints. You probably don’t want to use a water-based paint!
Premium Acrylic Paint
Pools that were previously painted using acrylic paint can be repainted with acrylic paint, as can pools that were previously painted with synthetic or rubber/latex paint. It can be applied on a damp surface and the finish will look glossy when the paint is dry.
A premium acrylic pool paint takes about 5 days to cure/dry for outdoor pools, while indoor pools take about 7 days with adequate ventilation. It takes about a week to cure.
Epoxy Paint
Epoxy paint is suitable for a pool that has never been painted and has a gunite, fiberglass, plaster, or concrete base. Only a pool that was previously painted with epoxy paint should be repainted with epoxy paint.
The epoxy paint will form a layer of approximately 8 mils over the surface and this thickness can make rough surfaces smoother.
How to Paint a Gunite Pool
Before you proceed, you’ll need a few essential items:
Step 1 – Drain & Dry the Pool
Use a submersible pump to drain the pool first. Make sure that you’re prepared for this process so that your backyard doesn’t get flooded. Use the local codes as a guide and if possible, direct the flow to a nearby sewer or storm drain.
For excess moisture, use a leaf blower and allow the entire surface to dry fully to the touch before you go on to the next step.
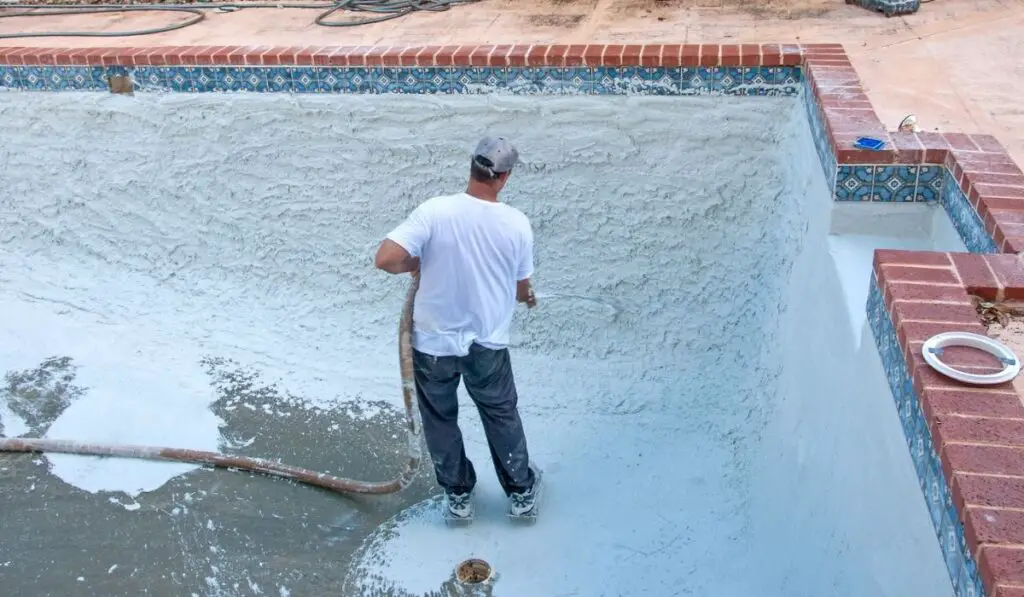
Step 2 – Deep Clean the Pool Surface
If you have an outdoor pool, do this on a sunny day and try to avoid windy conditions if possible. Wear protective gear and assemble the chemicals you’ll be using.
Mix some water and tri-sodium-phosphate (TSP) (on Amazon) in a garden sprayer or bucket. The mixture should be 50/50 or of higher concentration. We recommend this chemical in this mixture, because it’s extremely effective at removing deep-seated stains while also cleaning the pool in general. It’s also specifically designed to prep outdoor surfaces for painting.
Spray or otherwise apply the mixture to the pool all over. If you use a garden sprayer (on Amazon), be sure to follow up with scrubbing, until all stains and dirt are visibly cleaned. Rinse all this down with water and let the pool dry again. Be sure the pool is visibly clean before you move to the next step.
Step 3 – Final Clean/Prep the Pool Surface
Spray down the pool and make a new tri-sodium-phosphate (TSP) (on Amazon) mixture in a bucket. This solution should be used to wash the entire pool using a scrub brush.
Doing this will neutralize any leftover acid and get rid of any remaining grease and dirt. After completely washing the entire area, rinse it once again with water and leave it to dry.
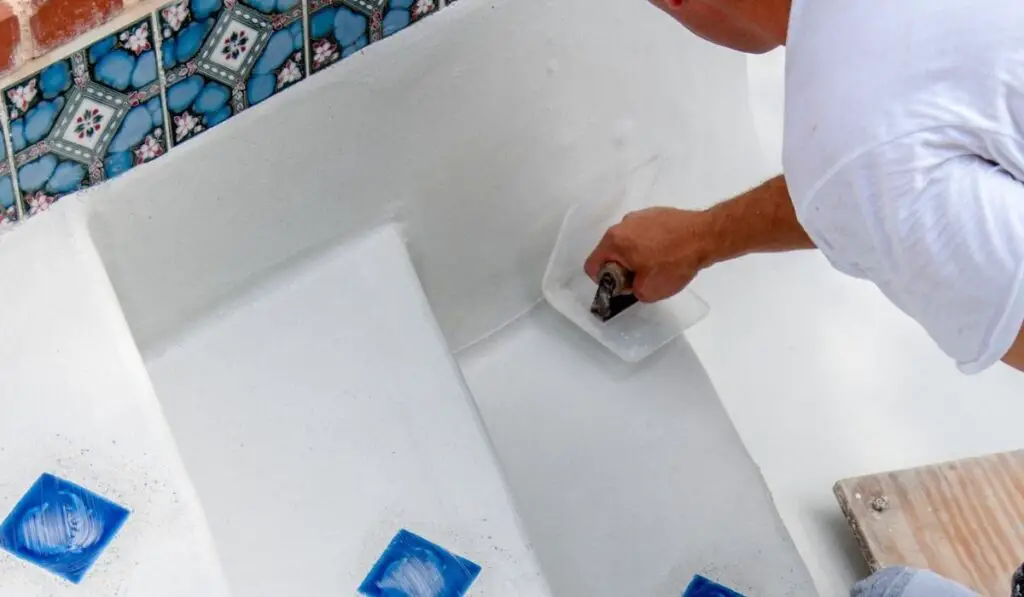
Step 4 – Fix Scratches
Look for damages such as divots and cracks on the surface and fix them using a concrete patch kit (on Amazon). Make sure that you read the instructions on any kit you’re buying to confirm that it’s suitable for the material used in making your pool. Tiny hairline cracks are not a problem as they can always be covered with paint.
Step 5 – Tape & Paint
Assemble your five-gallon bucket, paint, rollers, and brush. Though masonry waterproofing paint is an excellent choice, there is another paint specifically designed to provide your pool with the best protection. Some paints are specifically formulated for pools and are guaranteed to last for up to eight years or more.
Tape off any areas you won’t be painting and use the brush to cut in the pool while you work your way through the top rim. Pools vary from one another, and yours may not require that you cut in. You can simply cut in using a roller or tape the top of the pool off.
The choice is yours and depends on your own personal circumstances.
With a completely soaked roller, roll out the remaining part of the pool. You should progress from top to bottom as well as from the deep to the shallow end. Look out for late drips along the walls and let the pool floor come last. Gradually paint into the corner near the stairs and finish up there.
Tips for Maintaining Pool Paint
Painted pool surfaces get eroded slowly by the chlorinated or salt submersion until they need to be renewed after several years. Here are some tips to help you maintain your pool paint:
- Brushing down the walls as well as the floor areas of your pool is recommended.
- Wait for the chlorine or salt residues to settle, vacuum gently to waste, or flocculate/coagulate before you backwash and filter.
- This process should be followed by 8 hours of filtration.
- Do this each month of summer and every 6 to 8 weeks at most during colder seasons. Doing this will help to maintain a clean, glossy, and smooth pool and also make the coating last long.
- Keep on of the quick plaster patch kits on hand (on Amazon) so that you can tidy up and leaks or scratches to the gunite yourself, before repainting. We talked about how you need this for the painting process earlier, so maybe you were already thinking this!